
Congratulations on selecting the FreshVent™ for your project.
You’ll find its serious performance comes from exceptional features delivering benefits in longevity, aesthetics, efficiency, and ease of install. It all starts with a deep draw manufacturing process. This type of construction forces heavy steel into tight fitting form. Then it is powder coated with PPG Envirocron® for added weather resistance and visual appeal.It also includes engineering advances like the gravity-assist angled damper, integrated rubber bumper magnets, stainless steel hinge pin and spring, and a secondary back plate for additional mounting options.
Standard Install
STEP ONE
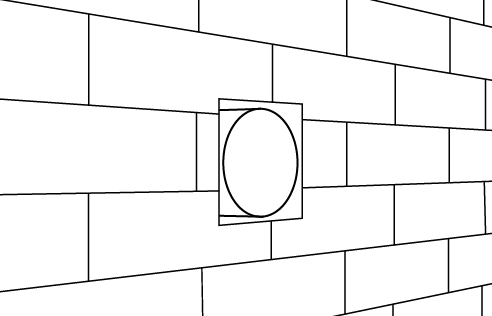
Confirm that 4” duct is flush to the exterior substrate.
STEP TWO
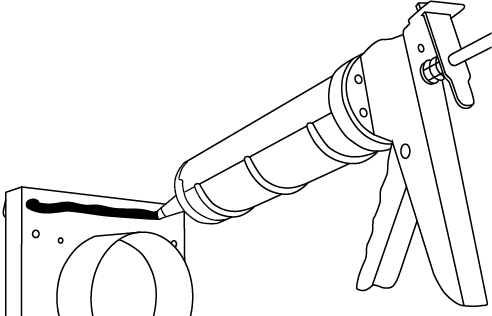
Add sealant around the perimeter of the backing plate.
Add sealant around the perimeter of the backing plate.
STEP THREE
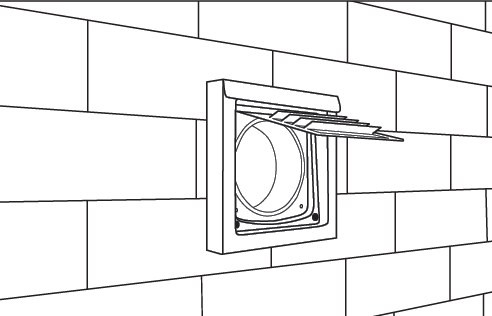
Insert FreshVent collar into 4” duct.
*If installing a No Collar unit, align opening with duct.
Insert FreshVent collar into 4” duct.
*If installing a No Collar unit, align opening with duct.
STEP FOUR
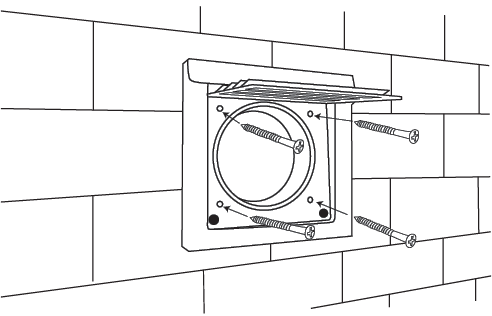
To secure to the substrate, install exterior rated fasteners through the inner screw holes.
To secure to the substrate, install exterior rated fasteners through the inner screw holes.
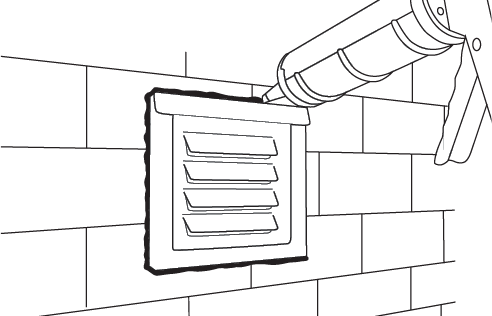
STEP FIVE
Apply sealant to all sides in contact with final exterior surface.
Tip: Bottom may be unsealed to allow for weeping.
Apply sealant to all sides in contact with final exterior surface.
Tip: Bottom may be unsealed to allow for weeping.
Backing Plate Install
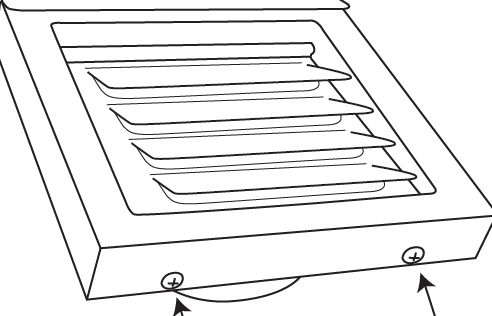
STEP ONE
To expose the fastener holes on the backing plate, remove the two #6 screws on the bottom of the FreshVent.
STEP TWO
Remove the damper assembly.
Remove the damper assembly.
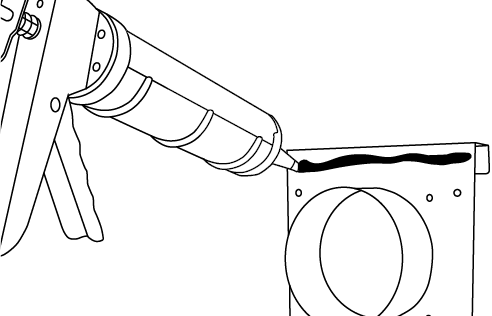
STEP THREE
Add sealant around the backing plate perimeter.
Add sealant around the backing plate perimeter.

STEP FOUR
Insert the FreshVent collar into 4” duct.
*If installing a No Collar unit, align opening with duct and skip to Step 5.
Insert the FreshVent collar into 4” duct.
*If installing a No Collar unit, align opening with duct and skip to Step 5.
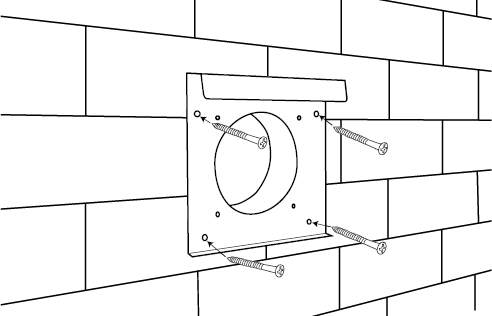
STEP FIVE
Install exterior rated fasteners through the outer backing plate holes.
Install exterior rated fasteners through the outer backing plate holes.
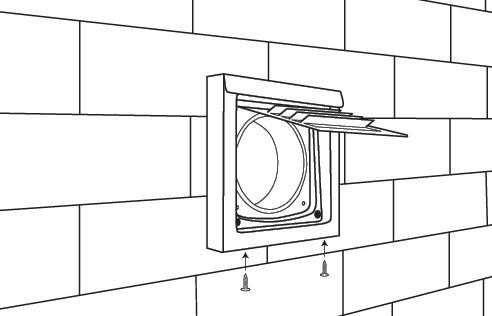
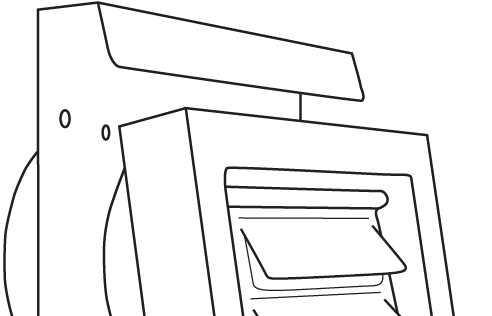
STEP SIX
Insert under the drip edge and secure bottom with the #6 screws.
Insert under the drip edge and secure bottom with the #6 screws.
STEP SEVEN
For added security, #14 exterior rated screws may be used in the inner screw holes.
For added security, #14 exterior rated screws may be used in the inner screw holes.
STEP EIGHT
Apply sealant to all sides in contact with final exterior surface.
Tip: Bottom may be unsealed to allow for weeping.
Apply sealant to all sides in contact with final exterior surface.
Tip: Bottom may be unsealed to allow for weeping.